
How to Refresh Braids Without Redoing the Whole Style
You know that sinking feeling. You spent hours (and a decent chunk of change) getting your braids installed. They looked crisp, neat, and perfect for the first week. But now? You’re looking at a halo of frizz, a scalp that feels like it needs a map, and braids that have lost their sleek, defined shape. The thought of taking them all down and starting over is exhausting. But you’re not ready to let go of the style just yet.
The good news is you don’t have to. Truly refreshing braids between installs is a skill, not a mystery. It’s about understanding the science of your hair, the structure of the braid, and the specific techniques that breathe new life into them without causing damage. This guide is about giving you the practical, step-by-step process to go from looking a little “rough” to looking “refreshed” in an hour or two. We’re diving into the real, specific things you can do to extend the life of your braids without sacrificing your edges.
The Real Reason Your Braids Look Tired
Before we fix the problem, we need to understand it. Your braids aren’t just “getting old.” They’re responding to a few key factors that, when addressed correctly, can be completely reversed.
First, there’s the issue of product buildup. We use gels, mousses, and edge controls to get that sleek look initially. Over time, these products mix with natural scalp oils and environmental dust. This creates a film on the hair that weighs it down, making it look dull and sticky. It also causes the braids to attract more lint and fuzz, accelerating that “old” look.
Second is moisture loss. Natural hair, especially textured hair, craves moisture. When it’s in a protective style, it’s often neglected. As the hair dries out, the cuticle opens up. This is what causes that fuzzy, halo effect around the braid. The hair literally swells as it loses moisture, making the braid look puffy and undefined.
Third is simply scalp tension and oil. Your scalp produces sebum. While it’s good for your hair, a week’s worth of it mixed with product residue can lead to itchiness and flakiness. A clean scalp is the foundation of a fresh-looking style. If your scalp feels heavy and dirty, your braids will look heavy and dirty, no matter how much you try to fix them.
How to Refresh Braids Without Redoing the Whole Style
The art of the braid refresh is a systematic process. It is not about one magic product, but a series of steps designed to restore your hair’s health and your braid’s appearance. Think of it as a complete system reset for your hair and scalp.
Step 1: The Scalp Detox
This is the most critical step. We’re not washing the braids in a traditional way, but we are doing a deep clean of the scalp. A clean scalp equals a lifted, fresh-looking style.
- Use a Witch Hazel or Astringent Spray: Take a spray bottle and fill it with a mixture of half witch hazel and half water. Witch hazel is a natural astringent. It breaks down oil and product residue without disturbing the braid’s structure. Part your braids in sections and spray this directly onto your scalp. Use a cotton round or a soft washcloth to gently wipe the scalp, removing dirt and buildup. This will instantly feel refreshing.
- Apply a Lightweight Exfoliating Scrub: If your scalp feels particularly flaky, you can use a scalp scrub with fine sugar or jojoba beads. Gently massage it onto your scalp in small circular motions before using the witch hazel spray. This breaks down dead skin cells and excess sebum, which are often the culprits behind itchiness.
Step 2: The Hydration Infusion
Now that your scalp is clean, we need to address the frizz and dryness of the hair itself. This is where you bring the definition back to the individual braids.
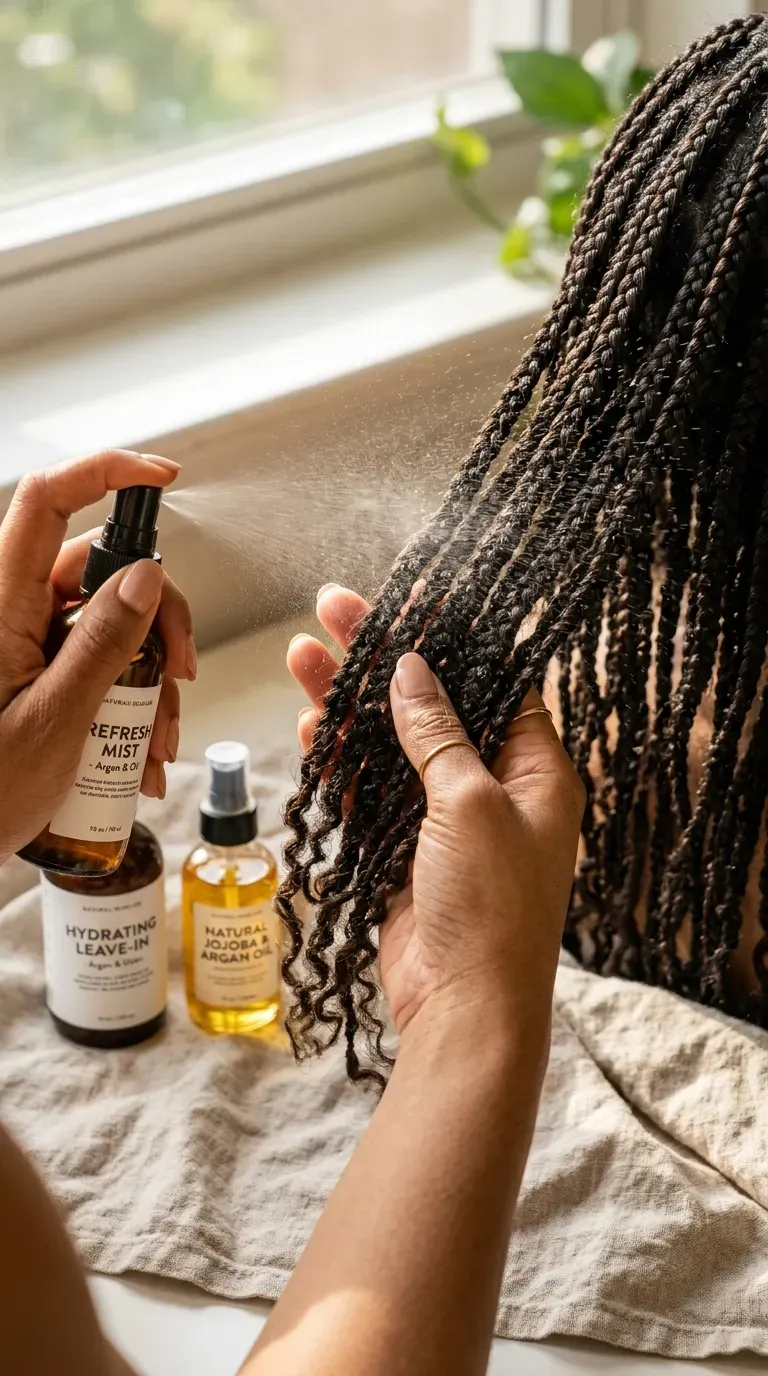
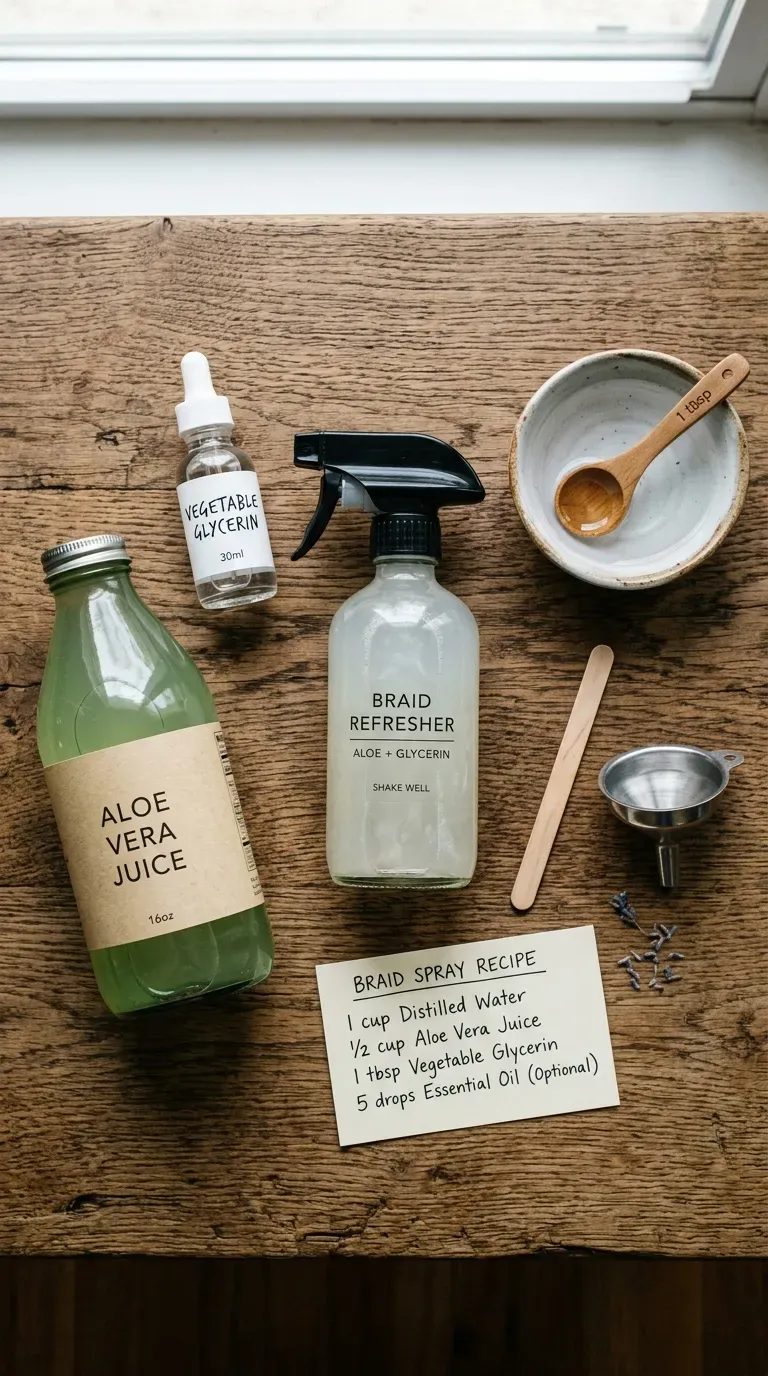
- The Mist and Seal Method: Do not drench your braids. That will make them heavy and prone to mildew. Instead, create a “braid refresher spray” in a fine mist bottle: 3 parts water, 1 part leave-in conditioner, and a few drops of lightweight oil (like jojoba or argan). Mist each braid lightly until it’s damp, not wet.
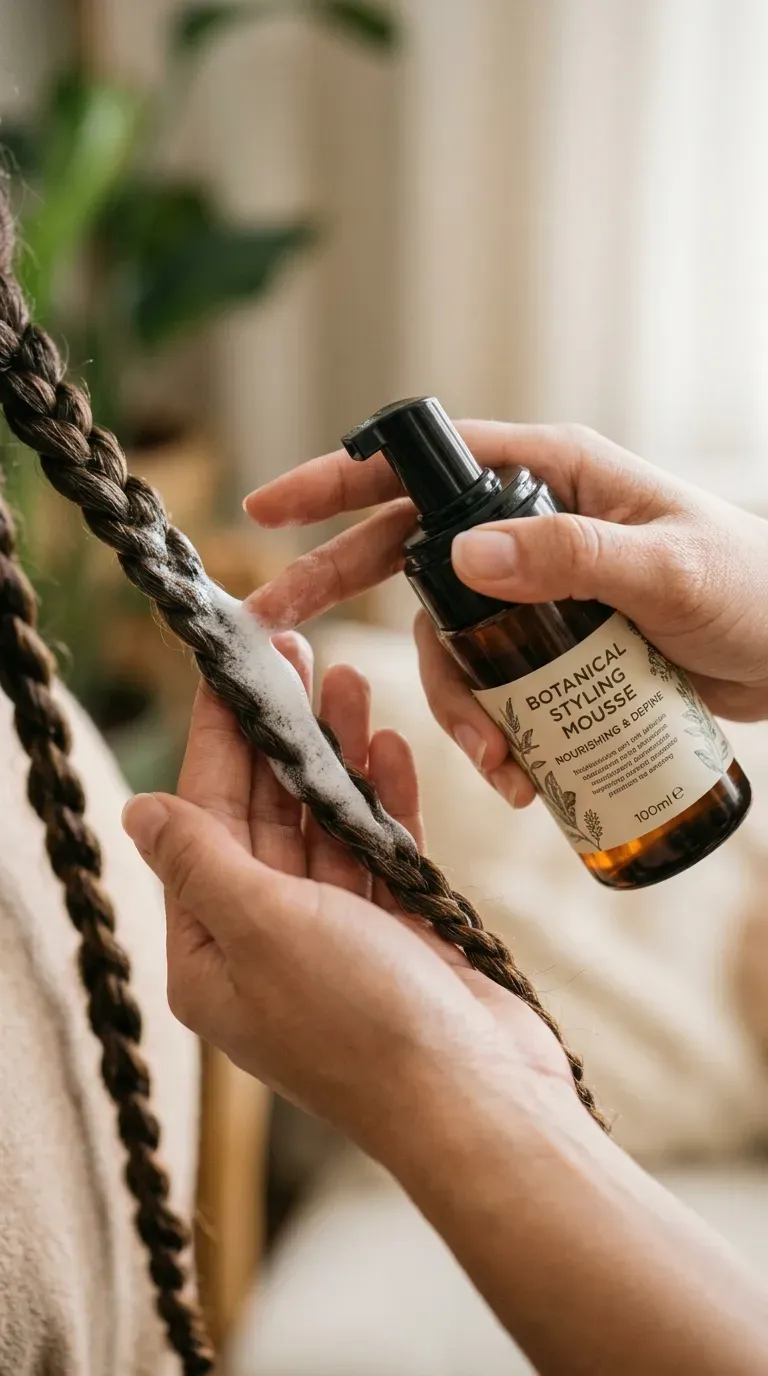
- Smoothing with Foam or Mousse: The real game-changer for braid refresh is a foam or mousse. Mousse is lighter than gel and won’t cause as much buildup. Apply a generous amount of mousse (like The Doux Mousse Def or a similar botanical foam) to your hands and gently smooth it down each braid from root to tip. This reactivates the hold and smooths down the cuticle.
- The Dryer’s Role: Use a hooded dryer or a blow dryer with a diffuser on a medium heat setting. The heat helps the foam set and dry, creating a cast that holds the braid in place and gives it a fresh, crisp feel. This is the step that transforms the texture of the braid from fuzzy to smooth. Do not air-dry completely; the heat setting is crucial for longevity.
Step 3: Tension and Refreshing the Edges
Your hairline and edges take the most stress. If they look fuzzy or are starting to lift, the whole style looks done.
- Re-Gel with Care: Do not use a heavy edge control. It builds up too quickly. Instead, use a light-hold gel or a botanical styling jelly. Apply it with a toothbrush or a boar bristle edge brush. The key is to brush the hair down and in toward the braid, not back toward your hairline, which can cause breakage.
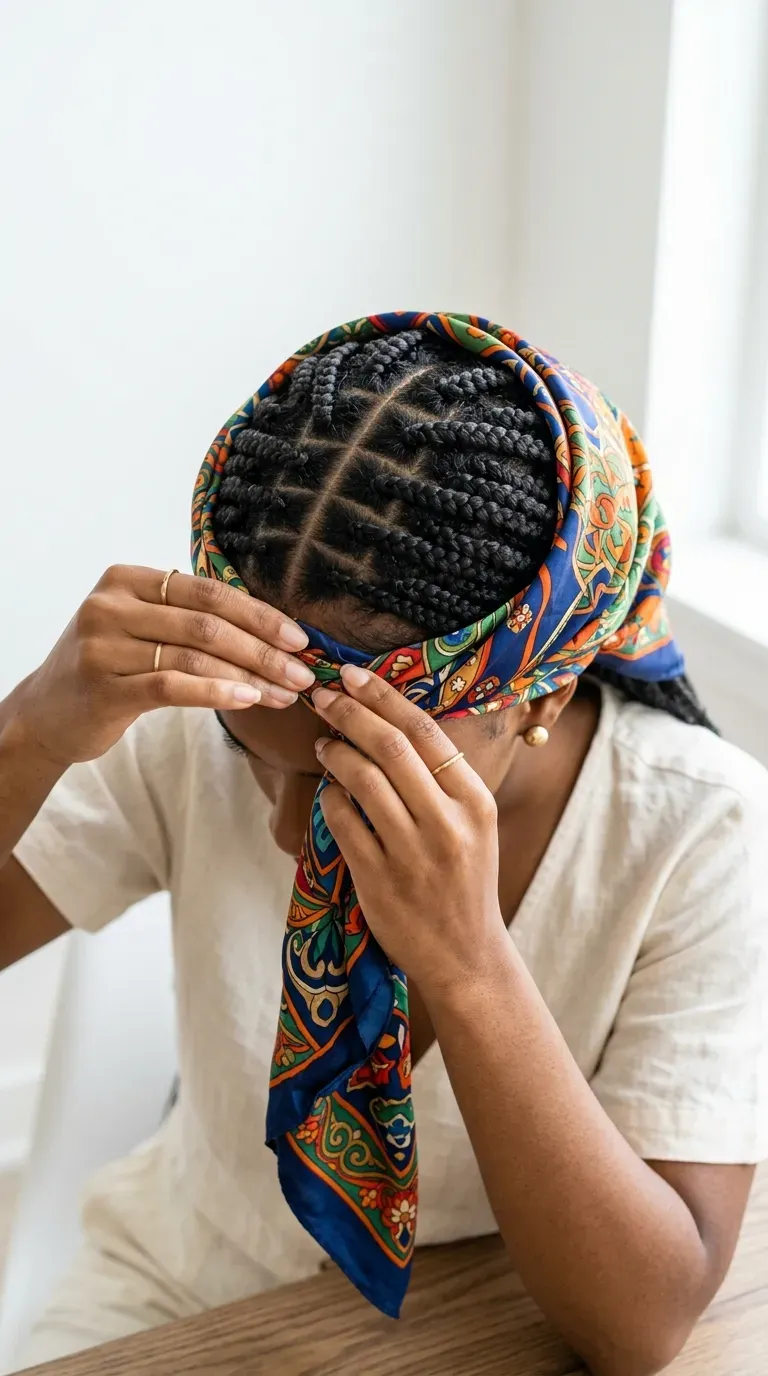
- The Satin Scarf Method: After you’ve smoothed your edges, wrap a satin scarf around your head for about 15-20 minutes while you let the mousse and gel set. This lays everything flat, provides tension to smooth out the braid’s roots, and tames any flyaways. It’s the secret weapon for that “just done” look.
Step 4: The “Haircut” Step for Frizz
Sometimes the frizz is not just from dryness. It can be from the hair strands shedding. This happens naturally, but it can make the braid look “hairy.”
- The Snip and Shave: For any small, stubborn flyaways or loose strands that are stuck to the braid, you can use a small pair of curved eyebrow scissors. Gently snip any loose hair that is visibly sticking out from the braid. Be careful to only cut the hair that is not attached to the braid itself. This is a precision move. Do not cut the hair within the braid; you are just cleaning up the edges. This is especially useful for the ends of your braids if you used extensions, where the synthetic hair may have some stray ends.
- The Correct Tool: Use a fine-tooth comb to smooth down the braid before you snip. This helps you see what is truly a stray hair versus what is part of the braid’s structure.
Common Mistakes and How to Fix Them
A lot of people approach their refresh wrong, which can make the hair look worse. Here are the specific mistakes to avoid.
Mistake #1: Over-wetting the braids. Soaking your braids in water will make them heavy, stretch them out, and take forever to dry. The trapped moisture can also lead to a mildew smell. The Fix: Always use a fine mist spray. If you need more hold, rely on the mousse or foam, not water. The moisture should be on the surface of the braid to smooth it, not penetrating deeply into the core.
Mistake #2: Using heavy oils and butters. A sheen spray or a heavy oil will create a greasy-looking style that attracts dust and lint. It weighs down the hair and makes it look limp. The Fix: Stick to lightweight, quick-absorbing oils like jojoba or argan. Or, better yet, skip the oil entirely and use a water-based refresher spray. The goal is volume and movement, not a greasy coating.
Mistake #3: Aggressive brushing. Brushing the braids forcefully can cause frizz and disrupt the pattern of the hair inside the braid. It can also break the hair off at the root. The Fix: Always brush in a downward motion with a soft-bristle brush. Use your hand to smooth the braid while you brush. The brush should be used for smoothing the surface, not detangling the hair inside the braid.
Mistake #4: Ignoring the roots. Sometimes the braid looks fine, but the root is lifted or “poofed” out. The Fix: Wrap your edges and the top of your head with a scarf for 20-30 minutes after applying gel to the roots. The pressure and heat will train the roots to lie flat again.
Different Hair Textures Need Different Care
One size does not fit all. The way you refresh your braids should depend on your hair’s natural texture.
For Fine or Thin Hair: Your main concern is avoiding weight and tension. You must be extremely gentle. Use the lightweight spray and foam method, but use half the product. You want to “barely there” the product to avoid weighing down the strands and causing a “helmet head” effect. Pay extra attention to your edges, as they are more susceptible to breakage. Avoid tight re-gelling. Use a light hold spray instead.
For Thick or Coarse Hair: You can be more generous with the mousse and gel. Thick hair can handle more product. Your main issue will be the frizz halo. You might need to do the “smoothing” step twice—once with the spray and once with the mousse—to really get in there and lay the cuticle down. You might also need more moisture, so ensure your spray has a higher water-to-conditioner ratio.
For Coily or Kinky Hair: Your hair’s tight curl pattern is likely to revert quickly. The “mousse and dryer” method is your best friend. The hold of a good foam will keep that curl pattern stretched and smooth. You might also want to add a very small drop of gel to your fingertips to smooth the hair down the length of the braid, rather than applying it from the palm. This gives you more control over the definition. You can also use a “braid spray” formulated specifically for braids, which often has a slightly stronger hold. [[INTERNAL LINK: best mousse for braids on natural hair]]
The Aftercare: Making the Refresh Last
Once you’ve done the hard work of the refresh, you want to protect it.
- Nighttime Protection: This is non-negotiable. Always wear a satin or silk bonnet or use a satin pillowcase. This prevents friction that causes frizz and protects the smoothness you just created. If you don’t, you’ll wake up with a frizzy mess and have to start the whole process again.
- The Mid-Week Spritz: Don’t wait until the braids are a mess. Spritz your braids lightly with your water and leave-in mixture every other day to maintain hydration. This prevents the cuticle from lifting in the first place. [[INTERNAL LINK: daily braid maintenance routine]]
- Massage Your Scalp: Keeping your scalp healthy will reduce the need for a heavy detox. Use a few drops of a lightweight oil on your fingertips and gently massage your scalp to stimulate blood flow and distribute natural oils. This will also reduce flaking.

FAQs About Refreshing Braids
Q: How often can I refresh my braids this way without damaging my hair?
A: You can do this light refresh about once a week. It’s not a full manipulation of the hair, just a smoothing and cleansing of the scalp. However, if you find yourself needing to do it more than twice a week, you might need to rethink the products you used at the initial install, as a stronger gel or mousse might be needed to keep the braids crisp for longer.
Q: What is the best shampoo for washing braids without ruining the style?
A: You should not “shampoo” braids in the traditional sense of a lather-and-scrub. This will cause massive frizz. Instead, use a clarifying rinse or a braid-specific shampoo that is very watery and applied with a squeeze bottle directly to the scalp, not the length of the braid. Rinse with the braids going in the same direction (downwards) to avoid tangling.
Q: My braids are starting to smell. Is there a way to fix this without washing them?
A: Yes. The witch hazel scalp detox (Step 1) is great for removing the oils that cause odor. You can also use a rosemary or peppermint essential oil spritz mixed with water and a drop of tea tree oil. Just a few drops on your scalp can act as a natural deodorizer and is refreshing. Never soak the hair in fragrant sprays, as they often contain alcohol that will dry the hair out more.
Specific Steps for a “2-Week Check-In” Refresh
After about two weeks, your braids will be in the “frizzy middle” phase. They aren’t old enough to take down, but they aren’t fresh. This is the perfect time to do a substantial refresh.
- Tighten the Roots (Gently): Some people like to go in and re-tighten individual braids. If you do this, make sure you are doing it at the root only. Pull the hair taut and use a small amount of gel to smooth the root. Do not twist the hair; just smooth it. This is a temporary fix for the “poofy” root effect.
- Deep Condition (the Lazy Way): You can apply a very small amount of a water-based deep conditioner to your braids, focusing on the ends. Leave it on for 15 minutes with a plastic cap. The heat from your scalp will help it penetrate, and then you can rinse it out in the shower. Just make sure to do this right before you plan to air-dry, as the moisture will loosen the hair’s hold. Rinse in a downward direction and re-apply your mousse after.
The difference between a style that looks “okay” and a style that looks “fabulous” a month in often comes down to a solid refresh routine. It’s not about avoiding the work, but about working smarter to preserve the time and money you’ve already invested. This process is your toolkit—use it to extend the life and beauty of your braids without the headache of a complete redo. Your hair will thank you for the consistent care, and you’ll feel a lot more confident walking out the door.